カテゴリ
- 学童・教育用品(25)
- 制御機器(15)
- パソコン/周辺機器(3)
- 空調・照明・電設資材(2)
- 測定用品(1)
絞り込み
ブランド
- 4D SYSTEMS(1)
- Adafruit(2)
- DIGILENT(2)
- Electronic Assembly(1)
- FORDATA(1)
- M5Stack(1)
- MIDAS(4)
- Seeed Studio(4)
- SPARKFUN(21)
- WINSTAR(1)
- みんなのラボ(1)
- エコリカ(1)
- カネカ(1)
- スワン電器(1)
- タカハ機工(2)
- ビット・トレード・ワン(1)
- 近藤科学(1)
エコロジープロダクト

「arduino oled」の検索結果
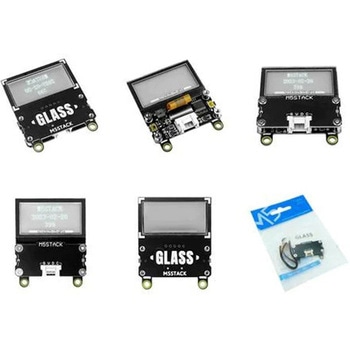
M5Stack用 1.5インチ透明OLEDディスプレイユニット
M5Stack¥6,298税込¥6,9281個3日以内出荷1.5インチの透明OLEDディスプレイユニット「UNIT GLASS」 STM32マイコンとSolomon Systech社製のSSD1309を搭載したM5Stack用の透明なOLEDディスプレイユニットです。SSD1309は、カソードコモンタイプのOLEDパネル用に設計されたOLED/PLEDドライバICです。解像度は128×64(透明部分は128×56)で、透過型でブルーのモノクロ表示です。2つの入力ボタンとブザー、M3ネジ用の穴を2個備えています。GroveコネクタでM5Stackに接続してI2C(アドレス:0x3C)によりデータ送信と制御を行います。そのため、M5Stack以外のコントローラでもGroveコネクタを装備していれば容易に使用することができます。 透明OLEDディスプレイ(128×56ピクセル) ガラス領域:42mm×27.16mm、表示領域:35.5mm×18mm モノクロ1ビット深度 I2Cによる制御(アドレス:0x3C) 開発環境:Arduino IDE、UiFlow仕様【MCU】STM32F030F4P6【I2Cアドレス】0x3C【表示領域】33.5×18mmセット内容1× 1.5インチ 透明OLEDディスプレイユニット、1× HY2.0-4Pケーブル寸法(mm)136×92×13パネルサイズ(mm)42.04×27.16×1.25電源電圧(V)3.3表示色青ディスプレイ1.51 インチ透明OLED解像度128×64ピクセル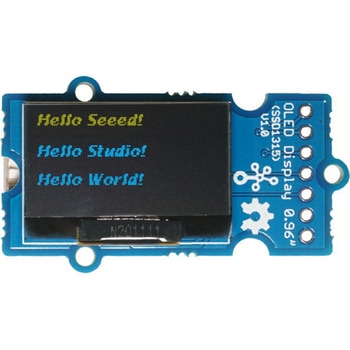
Grove-OLEDイエロー&ブルーディスプレイ0.96インチ
Seeed Studio¥1,498税込¥1,6481個当日出荷128×64ピクセルで黄と青の2色ディスプレイ。Solomon Systech製のSSD1315を使用した、0.96インチ、解像度128×64の黄と青の2色ディスプレイです。OLED(有機発光ダイオード)なので、LCDと比較して自己発光、高コントラスト比、薄型の輪郭、広い視野角、低消費電力など、多くの利点があります。3.3Vと5Vの両方で動作します。ディスプレイ:128×64ピクセル、黄と青の2色表示で高コントラスト/高輝度。低消費電力。I2C(アドレス変更可能)とSPIインターフェースに対応。Groveインターフェースに対応仕様●入力電圧:3.3V/5V●出力電圧:0~2.3V●解像度:128×64ピクセル●温度範囲:-40℃~+85℃●インターフェース:I2C、SPIアズワン品番67-0394-52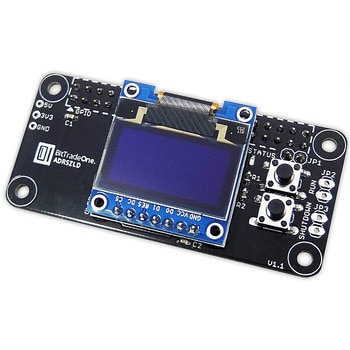
ゼロワン OLED拡張基板 【組立済】
ビット・トレード・ワン¥2,398税込¥2,6381個6日以内出荷コンパクトな”pHAT”サイズ コンパクトなRaspberry Pi Zero にぴったりの”pHAT”サイズでラズパイZeroと重ねて使用可能! 漢字表示も可能なOLED画面を搭載 0.96インチ 128×64ドット表示のOLED画面を搭載、ラズパイの機能を活用することで、従来、難しかった漢字表記も実現可能に。 ※OLED Organic Light Emitting Diodeの略。 ネットワークからの様々な情報を表示 接続されたラズパイからの情報を読み取らせ、例えばNTP時計としての使用が可能。 ネットワークで接続されたセンサ等の様々な情報も表示できます。 動作状況が見えるLEDを装備 ステータスLEDにより駆動状況の確認が容易に、実験時やメンテナンス時に役立ちます。付属品ネジセットx1/1X2ピンヘッダx1/保証書 x1仕様OLED:0.96インチ 128×64ドット 本体重量:15gスイッチ再起動スイッチ/シャットダウンスイッチ(シャットダウン等の動作についてはWEBページをご確認下さい)電源Raspberry Pi Zeroより給電対応機種Raspberry Pi Zero v1.3 / W / WH (v1.3,WにはGPIOピンヘッダのはんだ付けが必要です)Raspberry Pi 2/3 (ネジ固定が出来ない場合があります、再起動スイッチは使えません)本体寸法W65×D30×H17mm (突起部含めず)保証期間お買い上げから1年間生産国Made in JapanLEDステータスx1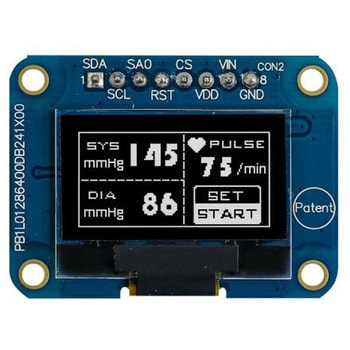
0.96インチ パッシブマトリクス 有機EL ディスプレイ 白 128 x 64 COB
MIDAS¥3,198~税込¥3,518~1個7日以内出荷Midas 128 x 64 解像度グラフィック OLED ディスプレイは、白地に白色の黒色で表示されます。この表示ではパッシブ Matrix が使用されます。動作温度: -40 → +80℃ ロジック電圧: 3 V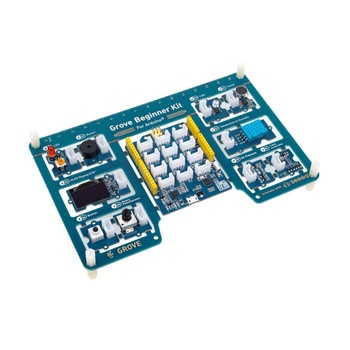
Grove ビギナーキット for Arduino
Seeed Studio¥5,698税込¥6,2681個3日以内出荷Arduino互換のオールインワンセンサーキット Arduino Uno互換のATmega328pベースのSeeeduino Lotusと、10個のGrove Arduinoセンサーを搭載したオールインワンキットです。すべてのモジュールは配線済みで、ブレッドボードやジャンパーケーブルも必要ありません。12種類のチュートリアル(PDF74ページ)が用意されているため、すぐにArduinoの学習を始めることができます。初心者やSTEAMの教育に最適です。 12個のGroveコネクタも搭載されているので、300以上のGroveモジュールを利用することができます。仕様【ボードに搭載されているもの】Grove-LED ×1、Grove-ブザー ×1、Grove-0.96インチOLEDディスプレイ ×1、Grove-ボタン ×1、Grove-回転ポテンショメータ ×1、Grove-ライト ×1、Grove-サウンド ×1、Grove-温度/湿度センサー ×1、Grove-空気圧センサー ×1、Grove-3軸アクセラレータ ×1、Seeeduino Lotus ×1セット内容Groveビギナーキット for Arduino ×1、microUSBケーブル ×1、Groveケーブル ×6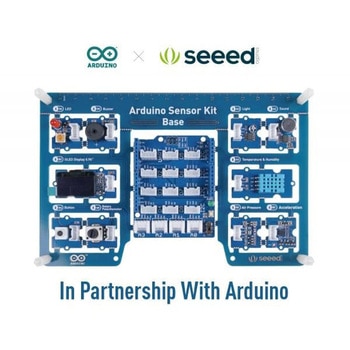
Arduinoセンサーキット-Base
Seeed Studio¥7,998税込¥8,7981個3日以内出荷教育用のArduinoスターターキット SeeedとArduinoが共同で開発した電子工作スターターキットです。一般的に使用される10個の電子モジュールが1枚のプリント基板に搭載されているため、ブレッドボードもはんだ付けも配線も必要ありません。Arduinoでは、このキットのチュートリアルを用意しています。仕様ヘッダー数:【I2C Grove】4【UART Grove】1【アナログGrove】4(A0、A1、A2、A3)【デジタルGrove】7(D2、D3、D4、D5、D6、D7、D8)その他【Arduinoコアをサポート】Arduino UNO、Arduino Leonardo、Arduino Zeroセット内容Grove LED ×1、Grove ブザー ×1、Grove OLEDディスプレイ(0.96インチ) ×1、Grove ボタン ×1、Grove ロータリーポテンショメータ ×1、Grove ライト ×1、Grove サウンド ×1、Grove 温度/湿度センサー ×1、Grove 空気圧センサー ×1、Grove 3軸アクセラレータ ×1、Groveケーブル ×6寸法(mm)175×115×28質量(g)77電源3.3V、5VRoHS指令(10物質対応)対応各種認証FCC/CE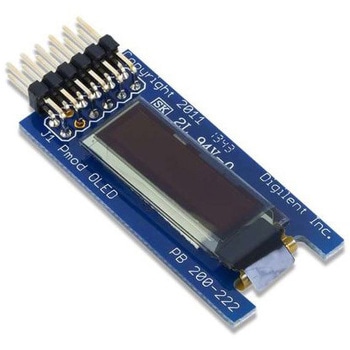
Digilent AMOLED 有機EL ディスプレイ 青 128 x 32
DIGILENT¥2,898税込¥3,1881個7日以内出荷仕様Pmod OLED 128×32ピクセルモノクロOLEDディスプレイ. Pmod OLED は、Solomon SystechのSSD1306コントローラとUnivision Technology Inc.のUG-2832HSWEG04ディスプレイを搭載した128×32ピクセルモノクロ有機LED (OLED)パネルです。. 128×32ピクセルグラフィックモノクロOLEDディスプレイ ディスプレイバッファ内蔵 輝度設定×16 ホスト通信 シリアルSPIバス 12ピンPmodコネクタ(SPIインターフェイス搭載) 寸法: 45.7×20.3mmタイプ【マトリックス】アクティブインターフェース【ポート】SPIディスプレイ【色】青解像度128×32pixelsRoHS指令(10物質対応)対応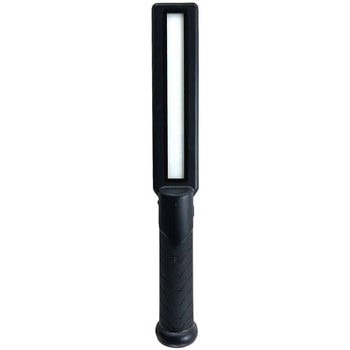
OLED ハンディライト mini
カネカ¥18,980税込¥20,8781台当日出荷・ハレーションが起きにくい「低反射」。拡散された光が対象物に届くため、強い照り返しを抑え白飛びによる不良箇所の見逃しを防ぎ、。ワーク表面の異変に気づきやすくなり、作業性の向上に貢献します。・広範囲を均一に照らす「面発光」。OLED照明が発する光は、広範囲を均一に照射できるため、広い視野を確保することができ、。作業時間の短縮が期待できます。・目が疲れにくい「低ブルーライト」。目に対する影響が大きいとされるブルーライト成分の波長が少ないことが確認されています。また、まぶしさを感じにくいため、負担の軽減に貢献します。・裏面のマグネットで壁面などに取付が可能。片手が使えないハンディライトの悩みを解消します。用途検査・メンテナンス現場において、作業者の目の安全を考えながら、高精度な検査を実現させたい。品質管理をサポートする新しいハンディライトです仕様●IPレート:IP52●OLED電流:170mA/272mA●充電回数:800回●全光束(lm):46(輝度:7,000cd/m2)、74(輝度:10,500cd/m2)※計算値質量(g)175使用温度範囲(℃)-10~40連続使用時間8時間色温度4000K(白色)充電時間3時間点灯方式2パターン(100%点灯/160%点灯)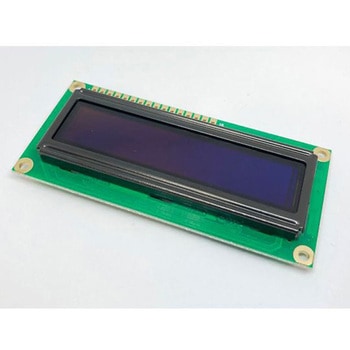
OLEDモジュール 16文字×2行 WEH001602シリーズ
WINSTAR¥3,298税込¥3,6281個6日以内出荷16文字×2行のキャラクタ表示タイプ。コントラストのはっきりした綺麗で読み取りやすい文字表示。視野角も広く、上下左右からでも良好な視認性が特徴。LCD標準のHD44780系コントローラと同じ操作性(イニシャライズ等一部変更が必要です)。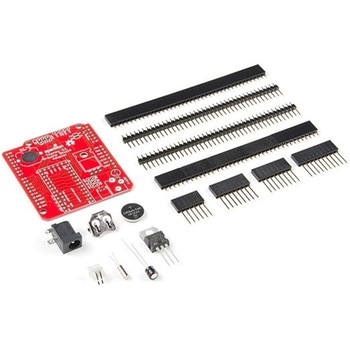
Teensy Arduino Shield Adapter
SPARKFUN¥4,798税込¥5,2781個33日以内出荷Description。The Teensy is an amazing and compact development platform in breadboard friendly form factor, but what if you could incorporate it into the Arduino architecture? The Teensy Arduino Shield Adapter allows you to attach your Teensy and utilize your favorite Arduino shields without the requirement of breadboard or any complicated wiring. Needless to say, the Teensy Arduino Shield Adapter is useful tool for upgrading all of your existing Arduino projects to more powerful controller!。As we stated before, the Teensy Arduino Shield Adapter provides basic Arduino compatibility with your run-of-the-mill shield but there are few other fun features that we've added on, as well. These features include Real Time Clock(RTC)battery, JST battery connector, 4-12V barrel jack connector, an ICSP header, and more. Because this board is simply an adapter, there is no special programming required to start working with the adapter. You will, however, need to program the Teensy for any Arduino shield you'd like to work with.。While the adapter design can fit the Teensy LC footprint, it has been designed to fully utilize the features of the Teensy 3.1. Not all of the features available on the adapter are compatible with the LC so please be sure to check the Hookup Guide in the。Documents。section below to ensure functionality for your project. Please keep in mind that this adapter may be incompatible with some 5V Arduino shields. Please check our hookup guide for more information.。Note:The Teensy Arduino Shield Adapter comes as kit and will need to be soldered together.。Note:Due to the requirements of shipping the batteries in this kit, orders may take longer to process and therefore do not qualify for same-day shipping. Additionally, these batteries can not be shipped via Ground or Economy methods to Alaska or Hawaii. Sorry for any inconvenience this may cause.。Features。Arduino R3 Interface。Real Time Clock Battery。JST Battery Connector。Barrel Jack。I2C Jumpers。ICSP Header。DAC Pin Headerアズワン品番67-0424-36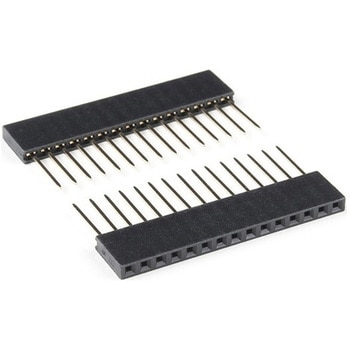
Arduino Nano Stackable Header Kit
SPARKFUN¥849税込¥9341個33日以内出荷Description。These stackable headers are made to work with the SparkFun Qwiic Shield for Arduino Nano or any comparable shield to connect the shield with a Arduino Nano footprint. This set includes two 15-pin headers; the pins are spaced by 0.1".。Each set of headers allows you to stack a Qwiic Nano shield on top of your Arduino Nano or plug them into a solderless breadboard.。Note:Soldering is required for functionality and physical attachment to a shield or board.アズワン品番67-0425-81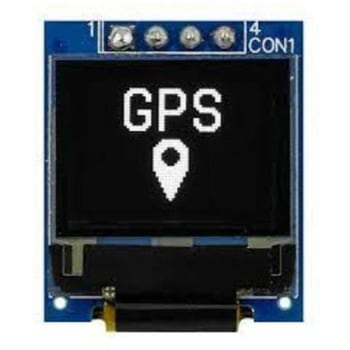
0.66インチ パッシブマトリクス 有機EL ディスプレイ 白 64 x 48 COB
MIDAS¥2,398税込¥2,6381個7日以内出荷Midas チップオンボード 64 x 32 解像度グラフィック OLED ディスプレイは、白地に黒色で表示されます。このディスプレイは SSD1306BZ コントローラを使用します。動作温度: -40 → +80 ℃仕様●ディスプレイサイズ:0.66インチ●画面縦横サイズ:15.42 x 12.06mm●マトリックスタイプ:パッシブ●ディスプレイ色:白●解像度:64 x 48●ドライバマウント:COB●インターフェースポート:I2C●寸法:19.9 x 23.1 x 2.4mm●奥行き:2.4mm●動作温度 Max:+80℃●シリーズ:MDOB064048A●コード番号:225-6196アズワン品番65-7249-18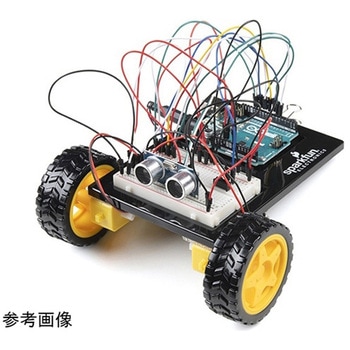
SparkFun Inventor's Kit for Arduino Uno - v4.1
SPARKFUN¥34,980税込¥38,4781個33日以内出荷。Description。The SparkFun Inventor's Kit(SIK)for Arduino Uno is a great way to get started with programming and hardware interaction with the Arduino programming language. The SIK includes everything you need to complete five overarching projects consisting of 16 interconnected circuits that teach everything from blinking an LED to reading sensors. The culminating project is your very own autonomous robot! No previous programming or electronics experience is required to use this kit.。The online guide contains step-by-step instructions with circuit diagrams and hookup tables for building each project and circuit with the included parts. Full example code is provided, new concepts and components are explained at point of use, and troubleshooting tips offer assistance if something goes wrong.。The kit does not require any soldering and is recommended for beginners ages 10 and up who are looking for an Arduino starter kit. For SIK version 4.1 we took an entirely different approach to teaching embedded electronics. In previous versions of the SIK, each circuit focused on introducing a new piece of technology. With SIK v4.1, components are introduced in the context of the circuit you are building, and each circuit builds upon the last, leading up to a project that incorporates all of the components and concepts introduced throughout the guide. With new parts and a completely new strategy, even if you've used the SIK before, you're in for a brand-new experience!。This version of the SIK replaces the SparkFun RedBoard Qwiic with the Arduino Uno(SMD version)and comes without the SIK guidebook and carrying case. With these components being swapped and removed, we were able to reduce the overall size and weight of the kit, making shipping cheaper and easier for anyone ordering internationally.。Note:As stated above, this SIK does NOT include a carrying case or print guidebook.。Get Started With the SparkFun Inventor's Kit v4.1 Experiment Guide。Examples。Project 1:Light。Circuit 1A:Blinking an LED。Circuit 1B:Potentiometer。Circuit 1C:Photoresistor。Circuit 1D:RGB Night-Light。Project 2:Sound。Circuit 2A:Buzzer。Circuit 2B:Digital Trumpet。Circuit 2C:"Simon Says" Game。Project 3:Motion。Circuit 3A:Servo Motors。Circuit 3B:Distance Sensor。Circuit 3C:Motion Alarm。Project 4:Display。Circuit 4A:LCD "Hello, World!"。Circuit 4B:Temperature Sensor。Circuit 4C:"DIY Who Am I?" Game。Project 5:Robot。Circuit 5A:Motor Basics。Circuit 5B:Remote-Controlled Robot。Circuit 5C:Autonomous Robotアズワン品番67-0424-34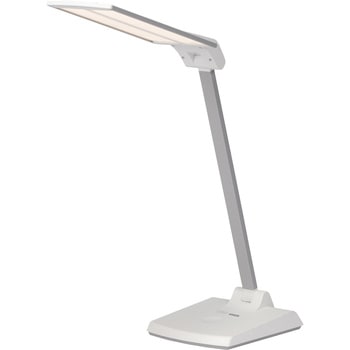
OLED SKY neo
エコリカ¥22,980税込¥25,2781台3日以内出荷眩しさが無く文字が読みやすい(長時間の読書) 面で発光、照射面を均一な光で照らし眩しさが無いので文字が読みやすく長時間の読書でも目の疲れを抑えられます。 また照射物の影が出にくいので目のストレスも抑えることができます。 ブルーライトリスクレス(学習やデスクワーク) 一般的なLED照明に比べてブルーライトの発生が少なく、ブルーライトによる目の負担や、 夜間にブルーライトを多量に浴びることが原因ともいわれる「体内時計の狂い」が引き起こす、睡眠障害のリスク軽減が期待できます。 太陽光に近い美しい光(繊細な手元作業) 高い演色性「Ra90」に加え、太陽光に近いスペクトルを持っているので色の表現力が高く、繊細さを求められる手元作業に最適です。演色性が高いと対象物がくっきり見える効果があり目の疲れ予防にもなります。 SKY neoはアーム部分が2箇所可変する構造となっており高い操作性も実現しております。質量(g)1250(ACアダプターを除く)消費電力(W)3~9.5電源ACアダプター(入力:AC100-240V)(出力:DC24V-1A)コード長さ(m)約1.5全光束(Lm)100~365定格寿命(時間)約30000(光束維持率70%時)平均演色評価数Ra90外形寸法(幅W×奥行D×高さH)(mm)140×430×380色温度(K)4000(白色相当)使用環境温度(℃)0~40使用環境湿度(%)0~70%RHRoHS指令(10物質対応)対応エコロジー商品省エネ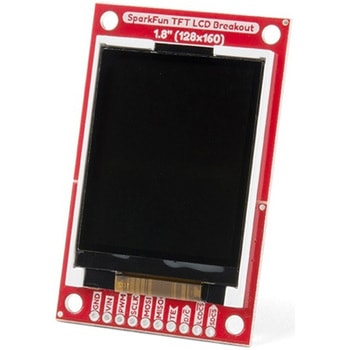
SparkFun TFT LCD Breakout - 1.8" 128x160
SPARKFUN¥9,998税込¥10,9981個33日以内出荷Description。The SparkFun TFT LCD Breakout is a versatile, colorful, and easy way to experiment with graphics or create a user interface for your project. With a 4-wire SPI interface and microSD card holder, you can use this breakout to easily add visual display/interface capabilities to a project as well as providing all the storage you might need for multimedia files.。To get started with this breakout, you will need an Arduino compatible microcontroller of your choice - we recommend something with extra RAM like the SparkFun Thing Plus. The breakout can be powered with either 5V or 3.3V. The microSD card holder is connected to the same SPI bus as the display which keeps the required pin count low and exists to relieve the burden from your microcontroller's poor memory due to having to store hundreds of images of cats, or really whatever you want to keep there. We have also gone ahead and tricked out the SparkFun HyperDisplay library with a driver made especially for this breakout!。Out of the box, the SparkFun TFT LCD Breakout will come with a large backing PCB that makes it easy to securely mount the display in a project. If you need a more flexible solution you can remove the display module, snap off half the backing board, and then re-insert the display module. When this is done you'll be left with the bare minimum frame around the display to more seamLessly integrate with your project.。Get Started With the SparkFun TFT LCD Breakout Guide。Features。128×160 RGB pixels。Up to 18 bit configurable color depth。2x PWM controllabele LED backlight。microSD Card Slot。V-Score for Minimal Footprint Setupアズワン品番67-0424-97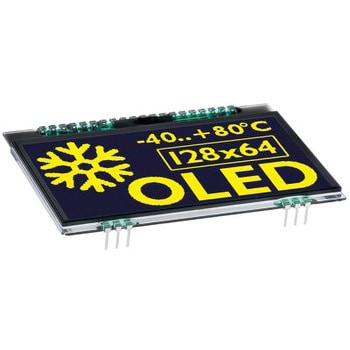
Electronic Assembly 2.9インチ AMOLED 有機EL ディスプレイ 黄 128 x 64
Electronic Assembly¥8,698税込¥9,5681個7日以内出荷RoHS指令(10物質対応)対応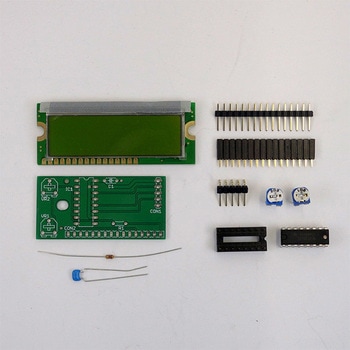
LCD3WIRE_BOARD(キット・液晶グリーン)
みんなのラボ¥3,298税込¥3,6281セット3日以内出荷キャラクタLCDを信号線3本だけで表示可能とする変換基板とLCDのセットです。 信号線は5Vでも3.3VでもOK!※液晶表示には5Vが必要です SPIやI2C用商品と違って、好きなI/Oに接続できます。 例:Arduinoの場合D0~D13,A0~A5の好きな所3箇所から選べます。 Arduinoとmbedでライブラリが公開されています。※Arduino用ライブラリはLiquidCrystalの初期化部分のみ変更すればprint部分などはそのままで使えます! 信号線が少ないため、デバック表示時などには特に威力を発揮します! こちらは基板と部品のキット品です(ハンダ付けが必要です)。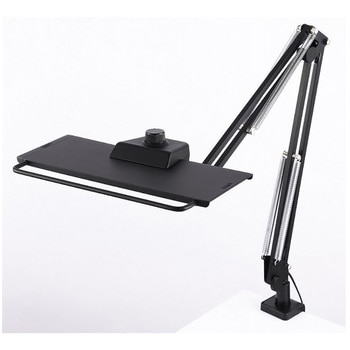
OLEDデスクライト 本体クランプ付 ブラック LEXシリーズ
スワン電器¥48,980税込¥53,8781個当日出荷紫外線を含まず赤外線やブルーライトを抑え、目の健康に配慮したOLED照明パネル搭載です。濃い影をつくらない面発光照明です。光を照らしたい位置でピタリと止まる、操作性に優れたアームです。テレワーク時の照明に寸法(mm)145×302(ヘッド部)電源(V)AC100(50/60Hz)アーム寸法(mm)280×360最大消費電力(W)13.5色温度(K)4000色(本体)黒光束(Lm)300アズワン品番64-0687-98クランプ取付幅(mm)5~50(付属品)直下照度(Lx)550(40cm)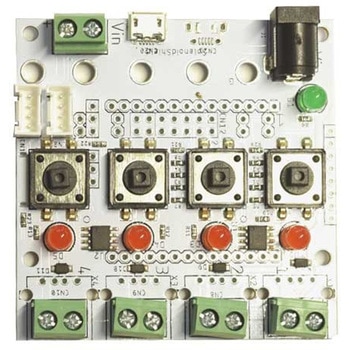
ソレノイド制御基板 マルチコントローラーA
タカハ機工¥2,798税込¥3,0781個欠品中簡単にソレノイドを駆動できる制御基板 ソレノイドの駆動電圧に合わせたACアダプタや電池ボックスを用意することで、簡単にソレノイドを駆動できる制御基板です。 ソレノイドの駆動電圧は、6V/12V/24Vが一般的なので、3.3Vや5Vで動作するマイコンとは別に電源を用意する必要があります。 電源にはプラグがΦ2.1でセンタープラスの一般的なACアダプタを接続し、ソレノイドはスクリューターミナルに電線で接続します。 ArduinoやRaspberry Pi、Ichigo Jam、micro:bitなどのマイコンボードを接続できる端子やコネクタの基板パターンが用意されており、GroveコネクタによりM5StackやSeeduinoを接続することもできます。ただし、使用する端子やコネクタは別途用意してはんだ付けする必要があります。 ソレノイドの駆動にはNチャンネルMOSFETが使用され、MOSFETのゲートにマイコンから5Vや3.3Vが印加されるとONになります。また、中央にあるタクトスイッチを押してもONになります。ONになると赤色LEDが点灯します。 スクリューターミナルにソレノイドを接続 最大4台のソレノイドを制御可能型式SB-6565-01寸法(mm)65×65×15質量(g)28タイプソレノイド接続タイプ:リード線端子タイプ接続接続可能マイコン:Arduino、micro:bit、Raspberry Pi、Ichigo Jam、Groveで接続可能なマイコンボード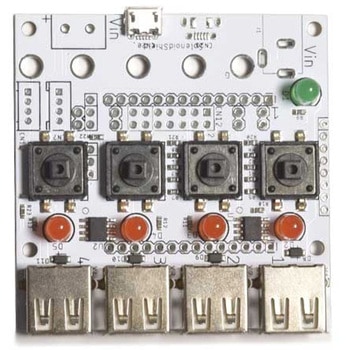
ソレノイド制御基板 マルチコントローラーUSB
タカハ機工¥2,798税込¥3,0781個3日以内出荷簡単にソレノイドを駆動できる制御基板 ソレノイドの駆動電圧に合わせたACアダプタや電池ボックスを用意することで、簡単にソレノイドを駆動できる制御基板です。 ソレノイドの駆動電圧は、6V/12V/24Vが一般的なので、3.3Vや5Vで動作するマイコンとは別に電源を用意する必要があります。 電源にはmicroUSBコネクタを持つACアダプタを接続し、ソレノイドはUSB Type-Aコネクタで接続します。 ArduinoやRaspberry Pi、Ichigo Jam、micro:bitなどのマイコンボードを接続できる端子やコネクタの基板パターンが用意されており、GroveコネクタによりM5StackやSeeduinoを接続することもできます。ただし、使用する端子やコネクタは別途用意してはんだ付けする必要があります。 ソレノイドの駆動にはNチャンネルMOSFETが使用され、MOSFETのゲートにマイコンから5Vや3.3Vが印加されるとONになります。また、中央にあるタクトスイッチを押してもONになります。ONになると赤色LEDが点灯します。 最大4台のソレノイドを制御可能 マイコンからの信号またはタクトスイッチでソレノイドを駆動 電源にはソレノイドの駆動電圧に合わせたACアダプタや電池などを使用 5V基板付きソレノイド(SSAH0830A、SSBH0830A)のソレキットに接続可能付属品ジャンパーピン4個型式SB-6565-03寸法(mm)65×65×13質量(g)25タイプソレノイド接続タイプ:USB Type-Aコネクタ接続接続可能マイコン:Arduino、micro:bit、Raspberry Pi、Ichigo Jam、Groveで接続可能なマイコンボード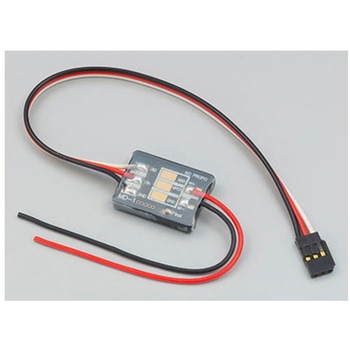
MD-1 ニュートラルブレーキ仕様
近藤科学¥3,500税込¥3,8501個5日以内出荷小型モーター専用のESC(Electric Speed Controller)。最大370サイズまでのブラシ付きモータに対応します。小型/軽量でロボットに搭載しやすいように、平らなデザインになっていますので市販の両面テープで簡単に固定することができます。MD-1には、一般的なラジコン用ESCと同じブレーキ&バック付きの(RCカーESC仕様)と、ロボットや工作セットの自作、改造に適した(ニュートラルブレーキ仕様)の2つのラインナップがあります。ニュートラルブレーキ仕様は、ロボットやキャタピラ工作セットなどにお勧めです。一般的なESCは前進操作の後のバック操作でブレーキになります。対して、ニュートラルブレーキ仕様では前進操作後のバック操作でそのまま後進することができます。ブレーキ操作は、ニュートラル位置(中心)に戻すことで効かせることができます。MD-1は、一般的なラジコン用サーボと同じようにPWM信号で制御することができるので、ArduinoなどRCサーボ用のライブラリをそのまま流用することができます。MD-1側で正転逆転、出力制御をするので、市販のモータドライバを使用するようなマイコン側で煩わしい電子制御部分を気にせず制御させることができます。マイコンボードへの配線も信号線、電源、GNDだけなのですっきりと収まります。最大電流は1.9A(FETスペック:5.3A)です。1.9Aを超えると電流リミットがかかります。電流リミット機能によりモータに負荷がかかりにくく、破損しにくい設計になっています。詳しい内容は、こちらのサポート情報をご覧ください。仕様●ブラシモーター専用スピードコンローラー●サイズ:27.0×20.5×4.4mm●重量:3.0g(本体のみ)●対応モーター:370以下の小型模型用DCモーター(ロック電流4A以下のブラシ付きモーター)●制御方式:PWM制御●適正電源電圧:3.0V~6.6V●(乾電池2~4セル、Ni-Cd&Ni-MH3~5セル、LiFe1~2セル、LiPO1セル)●ドライブ周波数:約4kHz●BEC出力:なし(別途電源の供給が必要です。)アズワン品番67-0359-02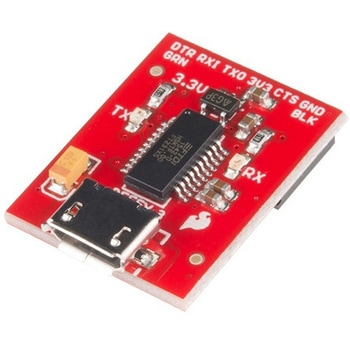
SparkFun Beefy 3 - FTDI Basic Breakout
SPARKFUN¥5,798税込¥6,3781個33日以内出荷。Description。This is SparkFun Beefy 3 FTDI Basic Breakout for the FTDI FT231X USB to serial IC. The pinout of this board matches the FTDI cable to work with official Arduino and cloned 3.3V Arduino boards. It can also be used for general serial applications. Built upon the same foundation as our 3.3V SparkFun FTDI Basic Breakout, the Beefy 3 is equipped with an AP2112K voltage regulator making this FTDI basic breakout board capable of handling a current load of up to 600 mA! With the addition of a more "Beefy" voltage regulator your will now be able to power a 3.3V project directly from the FTDI. The pinout of this board matches the FTDI cable to work with official Arduino and cloned 3.3V Arduino boards.。This board brings out the DTR pin as opposed to the RTS pin of the FTDI cable. The DTR pin allows an Arduino target to auto-reset when a new Sketch is downloaded. This is a really nice feature to have and allows a sketch to be downloaded without having to hit the reset button. This board will auto reset any Arduino board that has the reset pin brought out to a 6-pin connector. The pins labeled BLK and GRN correspond to the colored wires on the FTDI cable. The black wire on the FTDI cable is GND, green is DTR. Use these BLK and GRN pins to align the FTDI basic board with your Arduino target.。There are pros and cons to the FTDI Cable vs the FTDI Basic. This board has TX and RX LEDs that allow you to actually see serial traffic on the LEDs to verify if the board is working, however this board now requires a Micro-B USB cable. The FTDI Cable is well protected against the elements, but is large and cannot be embedded into a project as easily. The FTDI Basic uses DTR to cause a hardware reset where the FTDI cable uses the RTS signal.。This board was designed to decrease the cost of Arduino development and increase ease of use(the auto-reset feature rocks!). Our Arduino Pro and LilyPad boards use this type of connector.アズワン品番67-0430-06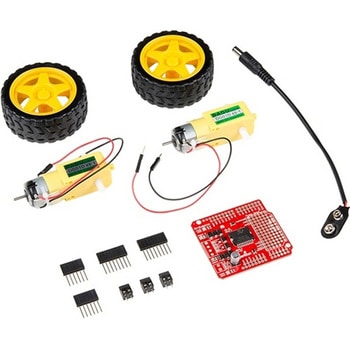
SparkFun Ardumoto Shield Kit
SPARKFUN¥9,998税込¥10,9981個33日以内出荷Description。Robots are fun, and Arduinos are easy. So wouldn't it be nice if there were kit that included everything you need to get your Arduino device set up to control simple two-motor-circuit buddy? The SparkFun Ardumoto Shield Kit is perfect for any robot enthusiast and includes an Ardumoto Shield, as well as pairs of tires, motors, connectors and wires. And, of course, it's all stuffed in classic SparkFun red box(which may come in handy as robot chassis).。The Ardumoto Shield is an easy-to-use dual-motor controller for Arduino. Combined with an Arduino, the Ardumoto makes fantastic controller platform for RC vehicles or even small autonomous robots. At the heart of the Ardumoto --- the big, black chip right in the middle --- is an L298, one of our favorite dual-channel motor drivers around, capable of driving up to 2A per channel. The board takes its power from the same Vin line as the Arduino board and includes blue and yellow LEDs to indicate active direction. All driver lines are diode protected from back EMF.。Note:The motors included with this kit are not compatible with the Wheel Encoder kit. Sorry for the inconvenience.。Get Started with the SparkFun Ardumoto Kit Guideアズワン品番67-0424-09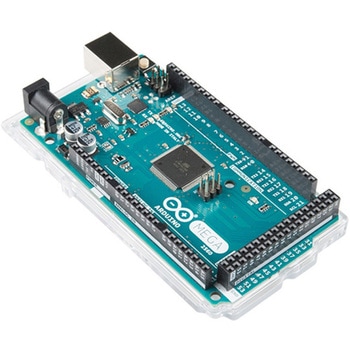
ArduinoMega 2560 R3
SPARKFUN¥18,980税込¥20,8781個33日以内出荷。Description。Arduino is an open-source physical computing platform based on a simple i/o board and a development environment that implements the Processing/Wiring language. Arduino can be used to develop stand-alone interactive objects or can be connected to software on your computer(e.g. Flash, Processing, MaxMSP). The open-source IDE can be downloaded for free(currently for Mac OS X, Windows, and Linux).。The Arduino Mega is a microcontroller board based on the ATmega2560. It has 54 digital input/output pins(of which 14 can be used as PWM outputs), 16 analog inputs, 4 UARTs(hardware serial ports), a 16 MHz crystal oscillator, a USB connection, a power jack, an ICSP header, and a reset button. It contains everything needed to support the microcontroller; simply connect it to a computer with a USB cable or power it with a AC-to-DC adapter or battery to get started.。Never fear for accidental electrical discharge, either since since the Mega also includes a plastic base plate to protect it!。The Mega 2560 R3 also adds SDA and SCL pins next to the AREF.。In addition, there are two new pins placed near the RESET pin. One is the IOREF that allow the shields to adapt to the voltage provided from the board.。The other is a not connected and is reserved for future purposes.。The Mega 2560 R3 works with all existing shields but can adapt to new shields which use these additional pins.。Not sure which Arduino or Arduino-compatible board is right for you? Check out our Arduino Buying Guide!。Features。ATmega2560 microcontroller。Input voltage - 7-12V。54 Digital I/O Pins(14 PWM outputs)。16 Analog Inputs。256k Flash Memory。16Mhz Clock Speedアズワン品番67-0349-13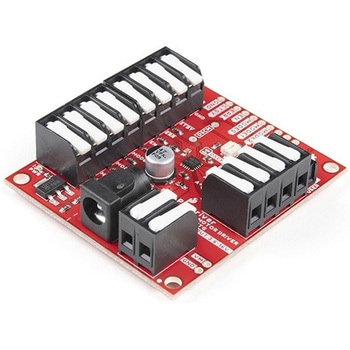
SparkFun ProDriver - Stepper Motor Driver TC78H670FTG
SPARKFUN¥6,398税込¥7,0381個33日以内出荷Description。The SparkFun ProDriver makes it easy to start developing with the TC78H670FTG bipolar stepper motor driver from Toshiba! Latch terminals provide instant solder-less connections to every feature offered. Use our extensive Arduino Library wアズワン品番67-0426-39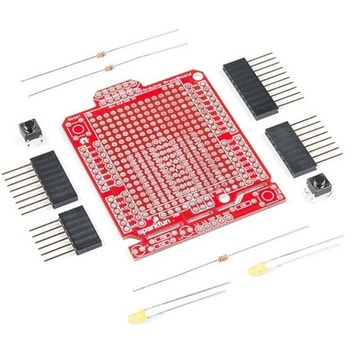
SparkFun ProtoShield Kit
SPARKFUN¥4,998税込¥5,4981個33日以内出荷Description。The SparkFun ProtoShield Kit lets you customize your own Arduino shield using whatever circuit you can come up with and then test it to make sure everything is working the way it should! The SparkFun ProtoShield Kit is based off the Arduino R3's footprint that allows you to easily incorporate it with favorite Arduino-based device.。One of our favorite features with this version of the ProtoShield Kit is the solderable-like breadboard prototyping area! Half of this area was designed with a breadboard in mind. On the underside of the shield you will be able to see open jumper pads between each through hole to make a connection like a breadboard. Once you add a component, simply add a solder jumper between holes to make a connection. For those that prefer the standard prototyping pads, we left the other side(near the BlueSMiRF and Serial UART ports)as is.。We have also moved the prototype testing components(those used to make sure your circuit works effectively)off of the "mainland" of the shield and onto a ProtoSnap styled, removable PCB. On this test area you will find soldering areas for the two yellow 3mm LEDs(as well as pins to control and power them), two 330 Ohm resistors, a 10K Ohm resistor, and a pushbutton.。Note:。Since this product is a kit, assembly and a basic knowledge of soldering will be required. The SparkFun ProtoShield Kit does not come pre-assembled.。Get Started With the SparkFun ProtoShield Kit Guide。Features。Arduino R3 Footprint。Soldering Kit。Solderable-Like Breadboard。BlueSMiRF or Comparable 6-pin Pins。Detachable Test Areaアズワン品番67-0422-25
Elektor MIT App Inventor Bundle
SPARKFUN¥25,980税込¥28,5781個33日以内出荷Description。The Elektor MIT App Inventor Bundle is a kit built to help learn about developing apps for Android compatible mobile devices using the MIT App Inventor online development environment. MIT App Inventor projects can be in either standalone mode or use an external processor. In standalone mode, the developed application runs only on the mobile device(e.g. Android). In external processor-based applications, the mobile device communicates with an external microcontroller-based processor, such as Raspberry Pi, Arduino, ESP8266, ESP32, etc.。The kit comes with a book and a selection of parts that correspond with a number of projects. Check out the features and Includes tab for more information.。Features。Projects Include:Using the text-to-speech component。Intonating a received SMS message。Sending SMS messages。Making telephone calls using a contacts list。Using the GPS and Pin-pointing our location on a map。Speech recognition and speech translation to another language。Controlling multiple relays by speech commands。Projects for the Raspberry Pi, ESP32 and Arduino using Bluetooth and Wi-Fi。MIT APP Inventor and Node-RED projects for the Raspberry Piアズワン品番67-0424-73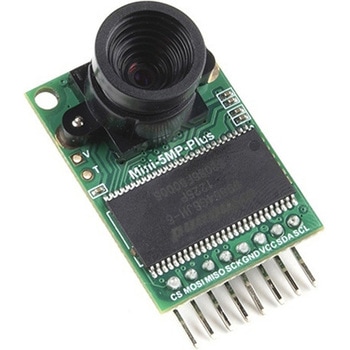
Arducam 5MP Plus OV5642 Mini Camera Module
SPARKFUN¥23,980税込¥26,3781個33日以内出荷Description。The Arducam 5MP Plus OV5642 Mini provides an easy to use camera solution for those working with low-cost microcontrollers such as those used with Arduino and the RP2040 from Raspberry Pi. It's a general purpose 5MP camera module that's SPI enabled reducing the complexity of controlling the camera. It's a step up in performance from it's predecessor, the Arducam-M-5MP. The most impressive aspect being that it's possible to control more than one of these from the same microcontroller. It features a M12 mount or CS-Mount lens holder with the ability to change lenses. Best of all, there's code libraries for Arduino, STM32, Chipkit, Raspberry Pi, and BeagleBone Black.。The Arducam 5MP Plus OV5642 Mini supports JPEG compression mode, single and multiple shoot mode, short movie recording, one-time capture multiple read operation, burst read operation, and low power mode.。Features。Power supply 3.3V~5V。Active array size:2592×1944。SPI speed:Max 8MHz。Shutter:rolling shutter。Frame buffer:8MByte。Pixel Size:1.4μm×1.4μm。Default M12 Lens:55°。Resolution support:5MP, 1080p, 720p, VGA, QVGA。Format support:RAW, YUV, RGB, JPEG。Size:34×24 mm。Weight:20g。Temperature Range:-10℃~+55℃。Lens Specification:sensor size:1/4″; EFL:4.9mm; F/N:2.2; BFL:1.2mm; HFOV:60 degree(SKU:U6067)アズワン品番67-0423-65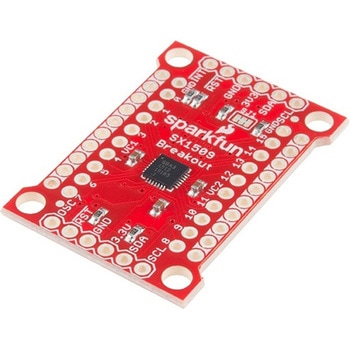
SparkFun 16 Output I/O Expander Breakout - SX1509
SPARKFUN¥2,198税込¥2,4181個33日以内出荷Description。Are you low on I/O? No problem! The SX1509 Breakout is 16-channel GPIO expander with an I2C interface that means with just two wires, your microcontroller can interface with 16 fully configurable digital input/output pins. But the SX1509 can do so much more than just simple digital pin control. It can produce PWM signals, so you can dim LEDs. It can be set to blink or even breathe pins at varying rates. This breakout is similar to multiplexer or "mux," in that it allows you to get more IO from less pins. And, with built-in keypad engine, it can interface with up to 64 buttons set up in an 8x8 matrix.。Two headers at the top and bottom of the breakout board function as the input and control headers to the board. This is where you can supply power to the SX1509, and where your I2C signals SDA and SCL will terminate. GPIO and power buses are broken out in every-which direction, and configurable jumpers cover most of the rest of the board.。Since the I/O banks can operate between 1.2V and 3.6V(5.5V tolerant)independent of both the core and each other, this device can also work as level-shifter. The SX1509 breakout makes it easy to prototype so you can add more I/O onto your Arduino or I/O limited controller. We've even spun up an Arduino Library to get you started!。Features。Enable Direct Level Shifting Between I/O Banks and Host Controller。5.5V Tolerant I/Os, Up to 15mA Output Sink on All I/Os。Integrated LED Driver with Intensity Control。On-Chip Keypad Scanning Engine Supports Up to 8x8 Matrix(64 Keys)。16 Channels of True Bi-directional Style I/O。400kHz I2C Compatible Slave Interfaceアズワン品番67-0419-88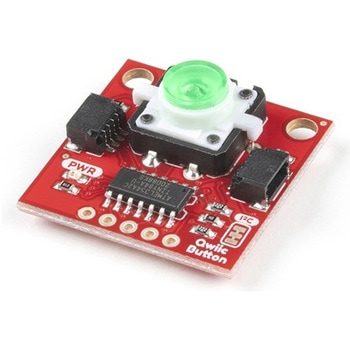
SparkFun Qwiic Button - Green LED
SPARKFUN¥1,698税込¥1,8681個33日以内出荷Description。Buttons are an easy and tactile way to interface with your project, but why would you want to deal with debouncing, polling, and wiring up pull-up resistors? The Qwiic Button with built-in green LED simplifies all of those nasty worries away into an easy to use I2C device! Utilizing our Qwiic Connect System, using the button is as simple as connecting cable and loading up some pre-written code!。If you need multiple buttons for your project, fear not! Each button has configurable I2C address, so you can daisy-chain multiple buttons over Qwiic and still address each one individually. We've got an example in our Arduino library that provides super-easy way to configure your Qwiic Button to whatever I2C address you desire. You can download the library through the Arduino library manager by searching 'SparkFun Qwiic Button' or you can get the GitHub repo as .zip file and install the library from there.。In addition to handling blinking and debouncing, the Qwiic Button has configurable interrupts that can be configured to activate upon button press or click. We've also taken the liberty of implementing FIFO queue onboard the Qwiic Button where it keeps an internal record of when the button was pressed. This means that code on your microcontroller need not waste valuable processing time checking the status of the button but instead can run small function whenever the button is pressed or clicked! For more information on interrupts check out our guide here!。The SparkFun Qwiic Connect System is an ecosystem of I2C sensors, actuators, shields and cables that make prototyping faster and less prone to error. All Qwiic-enabled boards use common 1mm pitch, 4-pin JST connector. This reduces the amount of required PCB space, and polarized connections mean you can't hook it up wrong.。Get Started with the SparkFun Qwiic Button Guide。Features。12mm Green LED Button rated for 50mA。Built in LED can be configured for your desired level of blinkiness!。Each button has configurable I2C address。Configurable interrupts check out our guide here!。FIFO queue。Don't like the color green? Check out the SparkFun Qwiic Button Breakout and add another colored button!。Red LED Tactile Button。Blue LED Tactile Button。Green LED Tactile Button。White LED Tactile Buttonアズワン品番67-0420-14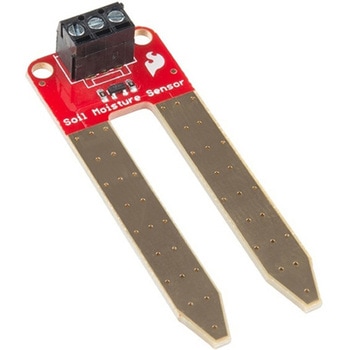
SparkFun Soil Moisture Sensor with Screw Terminals
SPARKFUN¥2,298税込¥2,5281個33日以内出荷Description。The SparkFun Soil Moisture Sensor is a simple breakout for measuring the moisture in soil and similar materials. The soil moisture sensor is pretty straightforward to use. The two large, exposed pads function as probes for the sensor, together acting as a variable resistor. The more water that is in the soil means the better the conductivity between the pads will be, resulting in a lower resistance and a higher SIG out. This version of the Soil Moisture Sensor includes a 3-pin screw pin terminal pre-soldered to the board for easy wiring and setup.。To get the SparkFun Soil Moisture Sensor functioning, all you will need is to connect the VCC and GND pins to your Arduino-based device(or compatible development board). You will receive a SIG out, which will depend on the amount of water in the soil. One commonly known issue with soil moisture senors is their short lifespan when exposed to a moist environment. To combat this, we've had the PCB coated in gold finishing(ENIG, or Electroless Nickel Immersion Gold).。Note:Check the Hookup Guide below for assembly and weatherproofing instructions, as well as a simple example project that you can put together yourself!。Get Started with the Soil Moisture Sensor Guideアズワン品番67-0426-56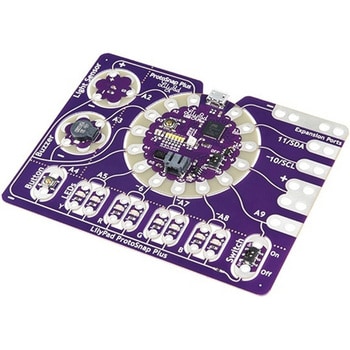
LilyPad ProtoSnap Plus
SPARKFUN¥14,980税込¥16,4781個33日以内出荷Description。The LilyPad ProtoSnap Plus is a sewable electronics prototyping board that you can use to explore circuits and programming, then break apart to make an interactive fabric or wearable project. Programming the ProtoSnap Plus is easy with the free Arduino software you'll need to program the ATmega32U4 on LilyPad USB Plus at the heart of the board. Once you've installed the software, you'll be able to write and upload your own programs to the board, making it do almost anything you want.。At the center of the ProtoSnap Plus is the LilyPad USB Plus microcontroller, pre-wired to a LilyPad board including a LilyPad Light Sensor, LilyPad Buzzer, LilyPad Button Board, four pairs of colored LilyPad LEDs and a LilyPad Slide Switch. Because these components are connected together on the ProtoSnap board, you can test out your project ideas before you sew. The ProtoSnap Plus also includes expansion ports that let you sew your wearables together or use alligator cables to easily connect external sensors and components. After testing out your coding ideas using the attached LilyPad pieces, you can break apart the prototyping board and sew them into your project!。Please be aware that the Lilypad ProtoSnap Plus is。NOT supported on Windows 7/8。due to a lack of support drivers for those specific OS's.。Note:。A portion of this sale is given back to Dr. Leah Buechley for continued development and education in e-textiles.。Get Started with the LilyPad ProtoSnap Plus Guideアズワン品番67-0422-45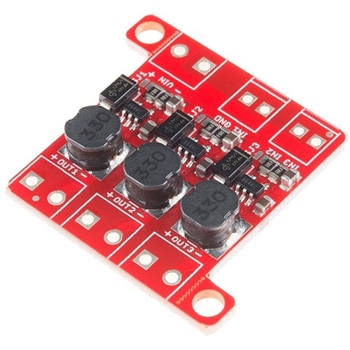
PicoBuck LED Driver
SPARKFUN¥5,298税込¥5,8281個33日以内出荷Description。The PicoBuck LED Driver is an economical and easy to use driver that will allow you to control and blend three different LEDs on three different channels. By default, each channel is driven at 330mA; that current can be reduced by either presenting an analog voltage or a PWM signal to the board. Version 12 of the board adds a solderable jumper that can be closed to increase the maximum current to 660mA. The new voltage regulator also increased the voltage rating on the various components on the board, allowing it to be used up to the full 36V rating of the AL8805 part.。Three signal inputs are provided for dimming control. You can use the PWM signal from an Arduino or your favorite microcontroller to dim each channel individually, or you can tie them all to the same PWM for simultaneous dimming. Dimming can be done by an analog voltage(20%-100% of max current by varying voltage from .5V-2.5V)or by PWM(so long as PWM minimum voltage is less than .4V and maximum voltage is more than 2.4V)for a full 0-100% range. A small jumper is provided for each channel to allow you to increase the drive strength from 330mA to 660mA. Two mounting holes for 4-40 or M3 screws are provided on either side of the board. They are perforated so they can be easily snapped off with a pair of pliers, if a smaller footprint is desired.。Note:。If you're going to use screw terminals, this board uses two different sizes. Check the related products for both sizes you'll need.。Note:。The PicoBuck LED Driver was made in collaboration with Ethan Zonca. A portion of each sale is given back to him.アズワン品番67-0420-83